The Real Reason Your Scrambled Eggs Keep Going Rubbery
Scrambled eggs have gotten complicated with all the conflicting advice flying around. Low heat. High heat. Cream. No cream. Constant stirring. Barely stirring. Today, I’ll share it all with you.
The diagnosis is almost insultingly simple: you’re running too much heat and leaving them on too long. That’s it.
Here’s the science— and I’ll keep this brief because you’re making breakfast, not defending a dissertation. Eggs are mostly water and protein. Heat triggers the proteins to tighten and bond together. Fine. That’s cooking. But push those proteins too hard, too fast, and they seize up completely. They squeeze out all the moisture they were holding. That expelled water is exactly why your eggs feel like an eraser and taste like nothing.
Most home cooks run medium or medium-high heat. The pan gets aggressive fast. The egg edges cook violently while the center is still raw. You panic-stir trying to catch up. By the time the middle sets, those edges have already seized and released their moisture. You pull the pan— residual heat keeps working— and what lands on your plate is dense, tough, and sad.
I spent years convinced I just wasn’t an eggs person. Turns out I was just impatient. Don’t make my mistake.
The Pan and Heat Setup Most Home Cooks Get Wrong
Start with the vessel. A nonstick skillet or a well-seasoned stainless steel pan matters more than most people realize— at least if you actually want consistent results. I’m apparently a nonstick person, and my beat-up 10-inch Calphalon works for me while cast iron never does. Paid around $28 for it at a Target clearance sale about six years ago. Still going strong. Cast iron holds heat too intensely in uneven pockets, which is exactly the enemy here.
Now, heat level. This is where most failures originate. Set the burner to medium-low. Not medium. Not medium-high. Medium-low. First time you try this, it feels completely wrong. The pan heats slowly. Nothing seems to be happening. Good. That’s correct.
A hot pan blasts the outer layer of eggs before the interior has any chance to catch up. You end up with a 50-degree gap— edges hitting 180°F while the center is still sitting at 130°F. That gradient creates textural chaos. Overcooked edges seize. Undercooked center eventually catches up. But by then the structural damage is already done. Medium-low heat closes that gap. Everything cooks together. Everything stays tender.
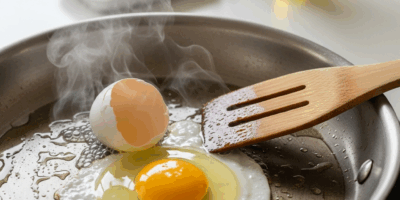
Before your eggs go in, melt roughly a tablespoon of butter over that medium-low heat. Wait for the foam to subside slightly. You want it smelling nutty, not turning brown. If it browns, the pan’s too hot. Start over— seriously. Then pour in your eggs and stay disciplined about the temperature.
How to Actually Stir Scrambled Eggs Correctly
But what is the right stirring method? In essence, it’s a fold, not a scramble. But it’s much more than that.
Most people attack scrambled eggs like they’re mixing cement— fast, aggressive, relentless. That’s the opposite of the goal. Grab a silicone spatula— the GIR Ultimate Spatula runs about $15 and has an edge that contacts the entire pan surface, unlike a wooden spoon which misses half the bottom. Push it slowly across the pan, making full contact with any cooked egg. When you reach the far side, fold the cooked portion up and over the raw egg still pooled in the middle. Then stop. Let the heat work for two or three seconds. Repeat.
Fold. Pause. Fold. Pause. Fold.
Your brain will beg you to stir faster. Ignore it completely.
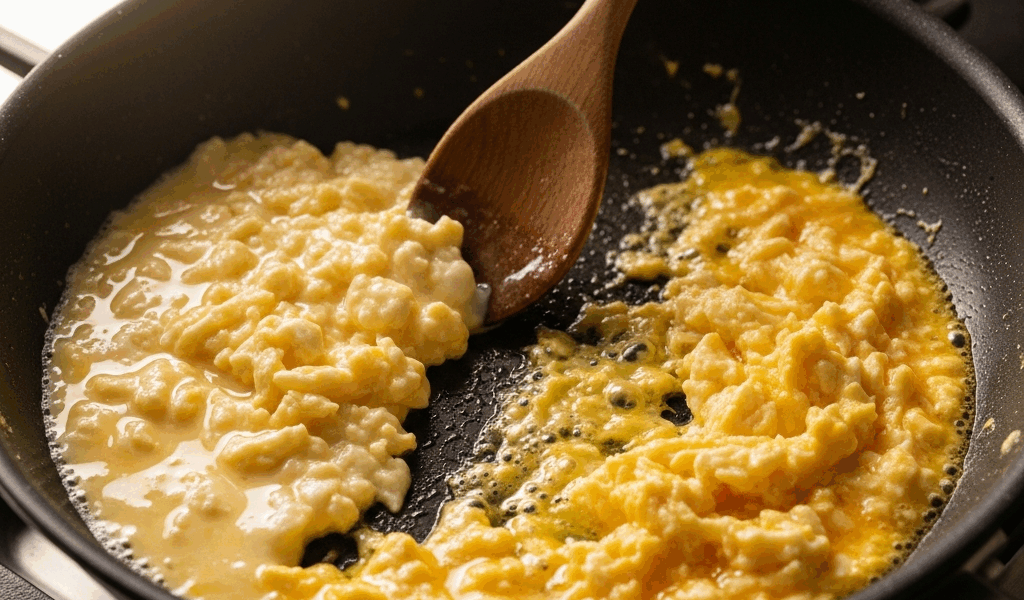
What you’re building here are large, creamy curds instead of tiny dry fragments. Aggressive constant stirring breaks eggs into small pieces too quickly— small pieces expose more surface area to heat— and they dry out almost instantly. The fold-and-pause method lets bigger curds form. Bigger curds hold moisture better. They also taste noticeably richer, which matters when the whole dish is four ingredients.
At each stage, the eggs should look layered and soft— cooked curds suspended in still-liquid egg. That visual is the whole game.
When to Pull the Pan Off the Heat
Probably should have opened with this section, honestly.
Pull the pan off heat when the eggs still look slightly underdone. Glossy. Barely set. Wobbling just a little when you tilt the pan. If they look fully cooked in the skillet, you’re already behind— they will absolutely firm up further on the plate.
Here’s the visual cue that actually works: stop folding when the eggs look like they need another 30 seconds. That gap between “almost done” and “actually done” is exactly where everything comes together. Remove the pan. Carryover heat finishes the job in about 30 to 45 seconds. You’re not fighting heat anymore— you’re using it deliberately.
Once the pan is off the burner, you can drop in a small cube of cold butter— maybe a quarter teaspoon— or a quick splash of heavy cream if you want. The cold fat slows the carryover cooking slightly and adds richness. Optional, but genuinely effective. Stir once or twice, serve immediately. That’s what makes this method eggs people.
Quick Fixes to Try on Your Next Attempt
- Use a nonstick or well-seasoned stainless steel pan— not cast iron.
- Set heat to medium-low and let the pan warm up gradually. No rushing.
- Melt butter until it foams slightly but watch it carefully— browning means too hot.
- Fold the eggs with a silicone spatula, pausing between each fold. No frantic stirring.
- Pull the pan off heat when the eggs still look glossy and slightly underdone.
- Let carryover heat finish everything on the plate over 30 to 45 seconds.
So, without further ado, let’s put this into practice. Get the heat right and the eggs essentially fix themselves. You’re not going to mess this up once you stop fighting the process— and once you stop turning the burner up out of impatience.


Stay in the loop
Get the latest home cuisine delights updates delivered to your inbox.