Why Your Beef Stew Turns Out Tough and Chewy
I’ve ruined more beef stews than I care to admit. The first time, I served my family something that tasted like it had been cooked inside a shoe. My mother-in-law politely asked for the recipe—which should have been my first clue that something had gone very wrong. After years of trial and error, plus watching my grandmother make stew the same way for forty years, I finally figured out why most home cooks end up with tough, chewy beef instead of that tender, falling-apart meat that makes stew actually worth eating.
Beef stew has gotten complicated with all the bad advice flying around. You throw meat in a pot with vegetables and broth. Somewhere between your kitchen and the dinner table, something breaks. That breakdown usually comes down to four specific mistakes — and the good news is that all four are completely fixable once you understand what’s happening.
You’re Using the Wrong Cut of Meat
This is where most people go wrong before they even turn on the heat. The cut of beef you choose determines whether your stew will be tender or tough.
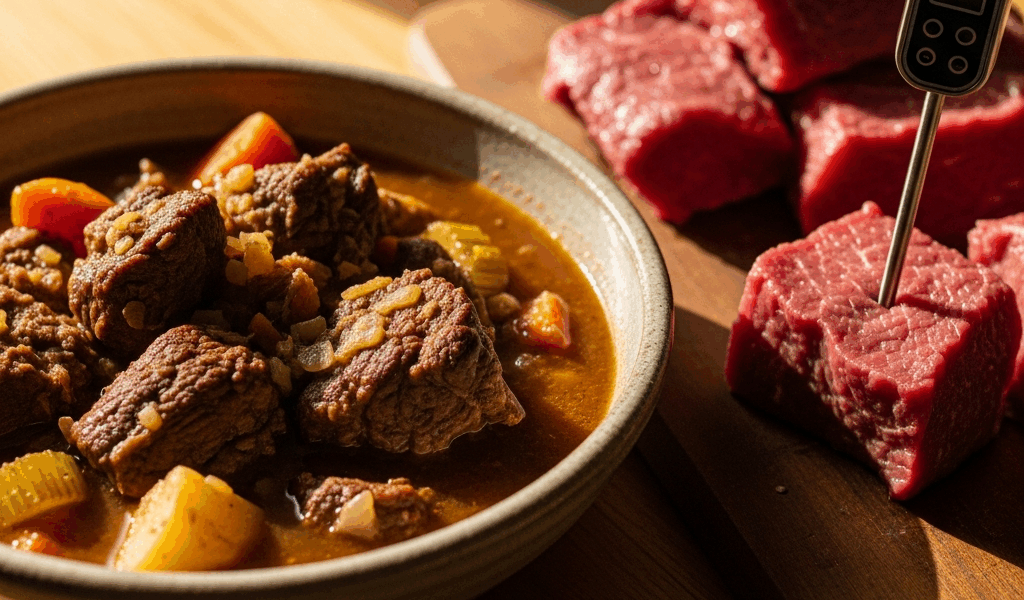
Chuck roast is what you want. A 2-pound chuck roast, bone-in or boneless, contains high amounts of collagen — that connective tissue that sounds unappetizing but is actually your secret weapon. When chuck roast cooks low and slow for three hours, that collagen breaks down and converts into gelatin. Gelatin dissolves into your broth and makes the meat itself incredibly tender. The fat marbled throughout chuck also keeps the meat moist even during long cooking. This is the essential piece most recipes never explain properly.
The mistake I see constantly? People buying sirloin tip, eye of round, or worse — lean beef labeled as “stew meat” from the discount bin. These cuts have almost no collagen. They’re the wrong shape. That $8.99 per pound package seems like a win until you’re chewing through rubber at dinner. Sirloin tip might appear done in ninety minutes, but it’ll be tough the entire time because there’s nothing to break down.
Here’s what actually works: Look for chuck roast roughly 1.5 to 2 inches thick with visible fat marbling throughout. Expect to pay $6 to $8 per pound at a regular grocery store. The cut label might say “chuck roast,” “chuck steak,” or “shoulder roast” — they’re essentially the same thing. You need that marbling. If the meat looks uniformly red with no white fat running through it, keep looking.
The cooking time difference matters too. Chuck roast needs 2.5 to 3.5 hours at low temperature. Lean cuts like sirloin might appear done after 1.5 hours, but that’s because the meat has already dried out and contracted, not because it’s tender. You’re basically cooking something tough into something even worse.
You’re Skipping the Browning Step
Probably should have opened with this section, honestly. Browning your meat before stewing is non-negotiable if you want actual flavor.
When you sear beef at high heat, the surface proteins react with sugars in the meat. This is called the Maillard reaction. It creates hundreds of new flavor compounds. Those brown, crusty bits aren’t just cosmetic — they’re the difference between stew that tastes like beef and stew that tastes like nothing.
Here’s exactly how to do it: Heat 2 tablespoons of vegetable oil in a heavy-bottomed Dutch oven or large pot over medium-high heat. Wait until the oil shimmers and just barely starts to smoke — this takes about three minutes. Cut your chuck roast into 2-inch chunks, pat them completely dry with paper towels, and season with salt and pepper.
Add the meat in a single layer. Don’t crowd the pot. I learned this the hard way by dumping all the meat in at once — it steams instead of browns. Work in batches if necessary. Leave the meat untouched for 4 to 5 minutes. Flip once and cook another 3 to 4 minutes on the second side. You’re looking for a deep golden-brown crust that looks almost burnished. Gray or pale? It’s not done browning yet.
Why do people skip this? Usually because they’re in a hurry or they think they’re saving time. I’ve heard “can’t I just skip straight to simmering?” at least a dozen times. You technically can. Your stew will cook. It will just taste fundamentally less interesting, and no amount of extra cooking time will fix that. That’s what makes this step endearing to serious cooks — it’s actually the gateway to flavor.
You’re Cooking at the Wrong Temperature
Oven temperature is where precision actually matters in stew-making. Most recipes gloss over it, but this detail changes everything.
Low and slow is the entire point. Set your oven to 200 to 225°F. Not 300°F like some recipes suggest. Not 275°F as a compromise. There’s a reason for this specificity — at this temperature, the water in your stew reaches a bare simmer with small bubbles rising from the bottom occasionally. High heat breaks down the collagen too quickly while squeezing moisture out of the meat itself. You end up with tender meat that’s somehow still dry. It’s a paradox that shouldn’t exist, and yet it does when the oven is too hot.
Cook covered for the first two to three hours. The lid traps steam and keeps meat from drying out. After that point, you can remove the lid for the final 30 minutes if your stew seems watery and you want to reduce the liquid. Most of the time, you don’t need to.
To check for doneness, use the fork-tender test. Pierce a piece of meat with a fork. If it shreds or separates easily, you’re done. If it requires any pressure or sawing motion, it needs more time. When the meat first reaches fork-tender texture, it’s finished cooking.
Here’s a timing reference based on actual cook times I’ve tracked: A 2-pound batch of 2-inch chunks at 225°F takes 3 to 3.5 hours. A 3-pound batch takes 3.5 to 4 hours. The difference isn’t huge because you’re cooking low and steady. Temperature matters more than size once you’re in this range.
You’re Not Giving It Enough Time
There’s no shortcut to tenderness. The collagen simply needs time to break down, and that process doesn’t speed up no matter what you do. This is where impatience kills stew.
I once tried to rush a stew by bumping the oven to 300°F after two hours thinking I could “catch it up.” I couldn’t. The meat was already starting to seize up from the higher heat, and all I accomplished was dried-out beef in a slightly less flavorful broth. Don’t make my mistake.
Minimum cook times are actually minimum. If your recipe says two hours, know that you’re probably getting chewy stew. Two and a half hours is pushing it. Three to three and a half hours is standard for chuck roast. If you’re cooking a larger batch or using particularly thick chunks, four hours isn’t excessive.
Signs that your stew is fully done: The beef shreds easily when pierced with a fork. The vegetables are soft — carrots should nearly fall apart when you poke them, potatoes should be completely tender. The broth has taken on a slightly richer color from the meat and vegetables breaking down together. There should be no pink or gray in the meat when you cut it open.
If you’re nervous about overcooking, stop worrying. Beef stew is incredibly forgiving at low temperatures. I’ve left stew in a 220°F oven for four and a half hours. It was perfect. More tender, actually, with even more gelatin from the extended cooking. As long as you’re below 240°F, you’re not going to ruin it by leaving it too long.
Quick Fix If You’ve Already Messed Up
You’ve made the stew. You’ve served it. The meat is definitely tough. Can you salvage it? Partially, yes.
- Extended cooking: Return the stew to a 200°F oven for another 45 minutes to an hour. Even tough meat will soften with more time, though it won’t reach the texture you could have achieved with proper cooking from the start.
- Add acid: Tomato paste — 2 to 3 tablespoons — red wine (half a cup), or vinegar (1 tablespoon) can help break down remaining collagen. Stir it in and cook for another 30 minutes.
- Thicken with puree: Blend some of the cooked vegetables into a puree and stir back into the stew. This creates a thicker broth that masks the texture issues somewhat and adds richness.
Real talk: Partial recovery is realistic. You might go from “this is inedible” to “this is acceptable.” You won’t reach “this tastes like I cooked it perfectly.” But it beats throwing it out.
Next time, remember the four things: chuck roast with visible marbling, sear it properly until it’s burnished brown, 200 to 225°F in the oven, and wait the full three hours minimum. That’s all you need.




Stay in the loop
Get the latest home cuisine delights updates delivered to your inbox.