Professional Plating at Home— 7 Techniques That Make Dinner Look Restaurant-Quality
Home plating has changed with all the conflicting advice flying around. White plates, odd numbers, artful drizzles— the internet has been recycling the same decorative tips for years without ever explaining the actual mechanics underneath them. And honestly? It’s mostly structural. Where things land on the plate, in what order, and why— that’s the whole game. None of it requires a squeeze bottle or a ring mold or anything you don’t already own.
What follows isn’t a mood board. It’s a set of specific, executable techniques pulled from real kitchen practice— adapted for home cooks who have a large spoon, a Microplane, and maybe a bag of Maldon salt they bought once and forgot about.
The Plate as a Canvas— Starting Point and Proportion
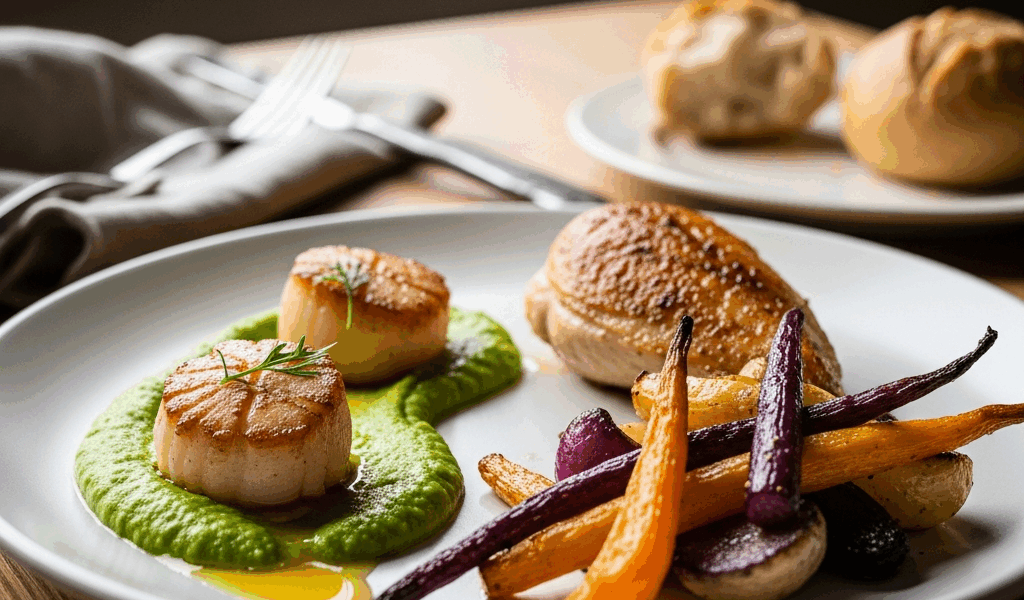
The first thing that changed how I plate food was learning that restaurant cooks think about the plate in zones. Not vaguely— specifically. The main protein or focal element goes at six o’clock, meaning bottom center when the plate is oriented toward the diner. Placing the anchor element at the bottom creates natural visual space above and to the sides— that’s where supporting components build upward. It also means the first thing someone sees when a plate lands in front of them is the main event, not a garnish or a sauce puddle.
The rim is not part of the food zone. Leave it clear— roughly one to two inches around the entire edge. Think of it the way a mat functions in a framed photograph. It tells the eye that what’s inside is intentional and contained. Cover the rim with sauce or a stray green bean and the whole composition collapses into something that reads as crowded and rushed.
Then there’s the odd numbers principle, which I resisted for a long time because it sounds like interior design nonsense. It isn’t. Three seared scallops look considered. Two look like you ran short. Four look like a children’s plate. The eye finds odd groupings more dynamic because even groupings form static shapes— squares, straight lines— while odd groupings create implied triangles, which have directional energy. Three dots of sauce, three slices of beef tenderloin, three roasted cherry tomatoes. Use it. Every time.
- Anchor protein at six o’clock (bottom center)
- Leave the rim clear— one to two inches minimum
- Work in odd numbers for any repeated element
- Build components upward and to the sides, not outward toward the rim
Sauce Placement— The Single Technique That Changes Everything
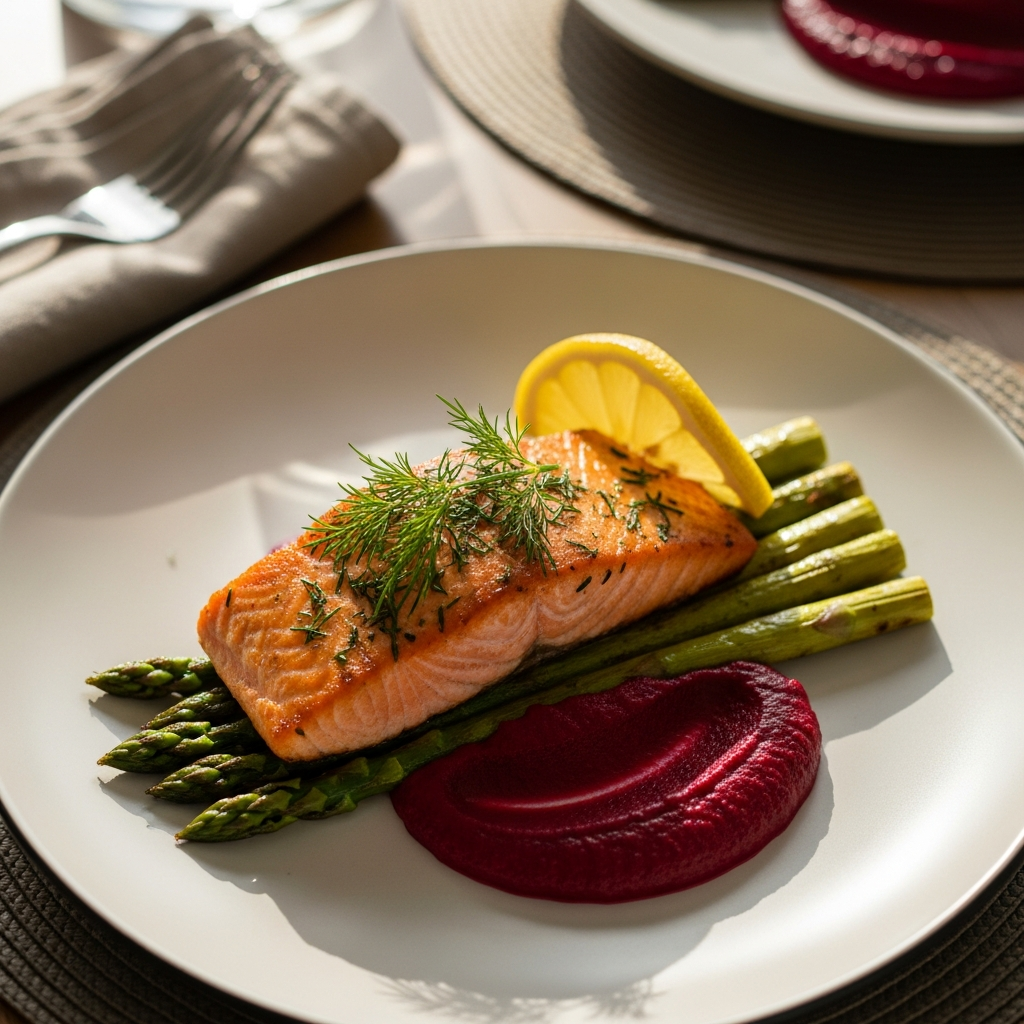
Probably should have opened with this section, honestly. If there is one thing that separates a restaurant plate from a home plate on sight, it’s what happens to the sauce. At home, sauce goes over the food. In a professional kitchen, sauce almost never goes over the food— it goes under it, placed deliberately before the protein ever touches down.
Pouring sauce over a finished protein hides the food. It buries the sear on a chicken thigh, covers the crust on a piece of fish, makes a beautifully cooked piece of meat look like it’s drowning. Sauce placed under the protein does the opposite— the food sits elevated, visible from all angles, and the sauce acts as a frame rather than a cover. That’s what makes this technique — it’s genuinely easier once you get it right.
The swoosh is how you make that placement look intentional rather than plopped. Here’s the exact process:
- Spoon two to three tablespoons of sauce into the center of the plate.
- Place the back of a large spoon— a regular soup spoon or a tablespoon from your flatware drawer— at the near edge of the sauce pool.
- Press the spoon lightly against the plate surface and drag it across the sauce in a confident single motion— either a straight line or a shallow C-curve.
- Lift the spoon cleanly at the end without going back for a second pass.
Sauce consistency matters here— a lot. Too thin and it spreads into a puddle with no defined edge. Too thick and the spoon drags and tears. You want something that coats a spoon but still moves— a pan sauce, a smooth pureed vegetable sauce, a beurre blanc. If it looks watery, reduce it another two minutes. I’ve ruined the swoosh more times than I can count by skipping that check.
Practice this once before guests arrive. Seriously— use water mixed with a little cornstarch to get the feel of the motion on a plate before you’re doing it with actual food getting cold on the counter. Don’t make my mistake and attempt it for the first time on a dinner party night.
Height and Texture— Creating Visual Interest
Flat food looks unfinished. A plate where every component sits at the same elevation reads as a cafeteria tray regardless of how good the food actually tastes. Height is how you signal that thought went into the composition.
The good news is that creating height doesn’t require ring molds or tweezers. It just requires changing how components are positioned relative to each other. Instead of placing a seared chicken breast flat on a pool of mashed potato, lean it against the mash at a slight angle. Instead of fanning sliced steak across the plate horizontally, stack the slices and overlap them slightly so they rise. Prop a piece of toasted bread or a crispy potato cake vertically against the protein.
Frustrated by watching beautiful food look completely inert on the plate, I started really studying a line cook during a long duck confit service— probably 100 portions in one night. What I noticed was that height almost always came from one element leaning on or resting against another, not from towers built independently. Things that lean stay put. Things stacked too high collapse before the plate reaches the table.
Texture contrast is the other half of this. Height draws the eye upward— texture holds it when it arrives. Smooth next to rough, soft next to crispy. These contrasts are visible from above, which is how a dish is first seen when it’s set on the table. A smooth potato puree next to fried shallots, toasted breadcrumbs, or a shard of Parmesan crisp creates the kind of sensory anticipation that makes food look like it will taste good before anyone takes a bite.
- Lean proteins against mounds rather than placing them flat
- Stack sliced meat instead of fanning it across the plate
- Use a crispy or textured element for contrast against smooth components
- The contrast should be legible from directly above
Finishing Touches That Work Without Equipment
The finishing layer is what makes a plate look like someone cared in the last thirty seconds before it left the kitchen. None of what follows requires anything special.
Flaky salt. A small pinch of Maldon sea salt— the pyramid-crystal kind, around $7 for a box that apparently lasts six months if you use it right— scattered over a finished protein, a fried egg, or a chocolate dessert does two things simultaneously. It adds actual flavor and texture, and visually it catches light in a way that fine salt cannot. The crystals are visible. They signal seasoning that was thought about, not just routine shaking.
Microplane zest. The Microplane Premium Classic— roughly $15, the one most home cooks already own— used to zest a lemon or orange directly over a finished plate of pasta, risotto, or fish adds color and brightness at the same moment. The oils released from fresh zest at finishing are more aromatic than anything added during cooking. Fine golden or yellow specks against a cream sauce or white fish read as professional immediately. No other step delivers that kind of visual payoff for zero effort.
Whole herb leaves. Torn or whole fresh herbs placed at the last moment look intentional in a way that chopped herbs simply don’t. A few whole flat-leaf parsley leaves, a small basil leaf or two, a dill sprig across a piece of salmon— the irregular edges of torn herbs look natural and deliberate at the same time. Chopped herbs look like an afterthought, every single time.
A small drizzle of good olive oil. Finished dishes drizzled with a high-quality extra-virgin olive oil— something with actual flavor, not the generic grocery store bottle you’ve had since 2021— pick up sheen under light. This is visible from across a table. It also adds flavor in the last moment before eating, which is when the nose is closest to the food.
Clean Plates Before They Leave the Kitchen
This is the step that collapses everything else if you skip it. Every professional kitchen— every single one— wipes the rim of each plate with a clean damp cloth before it goes out. Sauce drips, fingerprints, smears from assembling the dish: all of it lives on the rim until someone removes it. A five-second rim wipe is the difference between a composed plate and one that looks assembled in a hurry.
The technique is simple. Fold a clean kitchen cloth to a fresh section. Hold the plate steady in your non-dominant hand. Wipe the rim in one smooth, continuous circle with the damp cloth, rotating the plate rather than moving your hand around it. Use a clean section of cloth for each plate— not the same smeared corner you just used on the last one.
The first time I started doing this at home, the difference was immediate and honestly a little embarrassing. I couldn’t believe I’d been sending out plates without it. Even if every other technique here is executed perfectly, a sauce smear on the rim tells the eye that the dish was assembled carelessly. The rim is the frame. The frame has to be clean for the composition inside it to read correctly.
Do this for every plate, every time. It takes less time than garnishing and has more visible impact than almost anything else on this list.
Putting It Together— The Order of Operations
Sequence matters. The order in which these techniques are applied determines whether they reinforce each other or work against each other.
- Warm the plates. Cold plates drop food temperature immediately and dull the visual impact of a finished dish. Thirty seconds in a low oven or a minute of hot water rinse— either works.
- Place the sauce. Swoosh or spoon it into position before any food touches the plate.
- Anchor the protein at six o’clock. Use angle and lean for height.
- Add supporting components— starches, vegetables— building upward and to the sides.
- Add finishing elements: flaky salt, zest, herbs, olive oil drizzle.
- Wipe the rim.
- Serve immediately.
The whole process, once practiced, adds about ninety seconds per plate. That’s the actual cost of restaurant-quality plating at home— not special equipment, not culinary school, not squeeze bottles filled with reduced balsamic. Ninety seconds and a real understanding of why each step works. While you won’t need any professional kitchen gear, you will need a handful of basic tools: a large spoon, a Microplane, a clean cloth, and flaky salt might be the best starting investment, as plating requires that finishing layer to land correctly. The food was already good. This is just how you let it show.

Stay in the loop
Get the latest home cuisine delights updates delivered to your inbox.