The Real Reason Your Chicken Dries Out Has Nothing to Do With Your Oven
Cooking chicken has changed with all the conflicting advice flying around. High heat, low heat, cover it, don’t cover it, baste every ten minutes— everyone’s got a theory.
But what is the dry chicken problem, really? In essence, it’s a moisture loss issue. But it’s much more than that. It’s usually four separate mistakes stacked on top of each other, starting before the chicken ever sees heat. Most home cooks chase the symptom— overcooked, stringy meat— while completely ignoring what happened at the grocery store, on the counter, and in the prep stage. That’s exhausting. And it’s fixable.
So, without further ado, let’s dive in. These four mistakes are laid out in the exact order they happen— from fridge to plate. Fix them in sequence and you’ll stop ruining chicken before you even turn on a burner.
Mistake 1— You Are Cooking Cold Chicken Straight From the Fridge
Cold chicken cooks unevenly. Full stop.
A 38°F breast hitting a 425°F oven is a problem. The exterior gets blasted while the center is still basically refrigerator-cold— which means the outside has to keep cooking, keep drying out, just waiting for the inside to catch up. The surface gets torched. The final internal temp reads fine. The chicken still tastes like sandpaper.
Pull your chicken out 20 to 30 minutes before cooking. That’s it.
I know what you’re thinking. Bacteria. Room temperature. You’ve heard the warnings. Here’s the actual reality— leaving a sealed package of raw chicken on the counter for half an hour doesn’t compromise food safety. The USDA’s two-hour rule applies to cooked chicken sitting out exposed. A cold breast warming from 38°F to roughly 68°F in a sealed package? Completely fine. You’re not pushing it into any danger zone. Don’t make my mistake of skipping this step for three years because of a food safety concern that doesn’t actually apply here.
This single change— counterintuitive, stupidly simple— improved my chicken more than anything else I tried. Smaller temperature gradient means more even cooking from edge to center. Science is occasionally useful in the kitchen.
Mistake 2— You Are Skipping the Brine or the Salt Rest
Probably should have opened with this section, honestly.
Brining sounds like something a restaurant does with expensive equipment. It’s not. It’s salt dissolved in water. That’s the whole thing. But what is brining, exactly? In essence, it’s a way to chemically restructure the meat’s protein so it physically holds more moisture during cooking. But it’s much more than a simple soak— it’s the difference between dry chicken and chicken people actually compliment you on.
Salt breaks down myosin and actin— the two main muscle proteins in chicken. When those proteins unwind, moisture gets trapped inside the meat fibers and stays there even when heat is applied. No brine, no trap. The juice just runs straight out onto your pan while you stand there wondering what went wrong again.
You’ve got two routes here.
Wet brine: Dissolve 1/4 cup of Diamond Crystal kosher salt into 4 cups of cold water. Submerge your chicken. Minimum 30 minutes— two to four hours if your schedule allows. Pull it out, pat it dry, cook it. Most reliable method, especially for bone-in pieces.
Dry brine (salt rest): Pat the chicken dry first— actually dry, paper towels, press down. Then salt it all over at roughly 1 teaspoon of kosher salt per pound. Leave it uncovered in the fridge for 8 to 24 hours, or on the counter for at least 40 minutes before cooking. The salt pulls a little surface moisture out, dissolves into it, then gets reabsorbed back into the meat. Bonus— it gives you dramatically crispier skin when roasting.
I’m apparently a dry-brine person and the 40-minute counter rest works for me, while wet brining never quite fits my weeknight schedule. Both work. Pick the one you’ll actually do consistently.
Mistake 3— You Are Cutting Into It Too Soon
Resting is where home cooks absolutely lose their nerve. The chicken smells done. Everyone’s at the table. Every instinct says slice it now and serve it hot.
Don’t. Wait.
Heat pushes moisture outward during cooking— toward the surface, toward the edges, trying to escape. Cut the meat open immediately and that moisture floods straight out onto your cutting board. You’ll literally watch a puddle form. What’s left inside is dry. Rest the chicken for even five minutes and that moisture has time to redistribute back toward the center, reabsorbing into the fibers you worked so hard to prep correctly.
Timing depends on the cut:
- Chicken breasts: 5 to 10 minutes minimum
- Thighs or drumsticks: 5 minutes
- Whole bird: 15 to 20 minutes, loosely tented with foil
Set a timer. Walk away from the cutting board. That’s the whole technique. Five minutes of restraint will do more for your chicken than an expensive thermometer or a new pan.
Mistake 4— Your Heat Is Wrong for the Cut You Are Cooking
Chicken breasts and thighs are not interchangeable. They have completely different fat profiles— and that matters more than most people realize.
Thighs have roughly three times the fat content of breasts. Fat buffers against dryness. It conducts heat more slowly and keeps moisture locked in even under aggressive cooking. You can absolutely hammer a thigh at 450°F— I sear them skin-side down in a Lodge cast iron skillet at that temp regularly. The skin goes shatteringly crispy. The inside stays juicy. That’s what makes thighs weeknight cooks who want less stress and more margin for error.
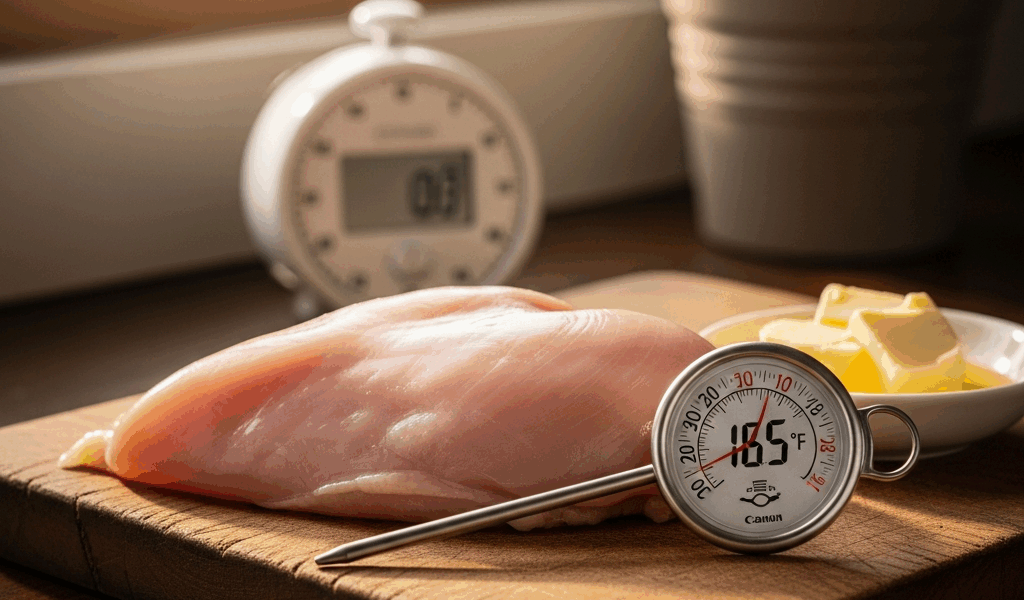
Breasts are a different situation entirely. High heat overcooks the exterior before the center catches up— especially if you skipped the room-temperature rest or the brine. A 375°F to 400°F oven, or a medium-high pan rather than a screaming-hot one, gives the center time to reach temperature without torching the outside. While you won’t need precision restaurant equipment, you will need a reliable instant-read thermometer— a Thermapen or even a $15 ThermoPop works fine.
Target internal temp is 165°F. Pull it at 160°F. Carryover cooking— the residual heat still moving through the meat after it leaves the pan— coasts it to 165°F during the rest. That’s your five-degree safety margin without the extra minute of oven time that dries everything out.
Fix these four things in order and dry chicken basically stops being a problem. It’s not the oven. It never was.


Stay in the loop
Get the latest home cuisine delights updates delivered to your inbox.