What Crystallization Actually Is
Caramel has changed with all the conflicting advice flying around. But the science behind why it seizes is actually pretty straightforward— once you understand it, the whole thing clicks.
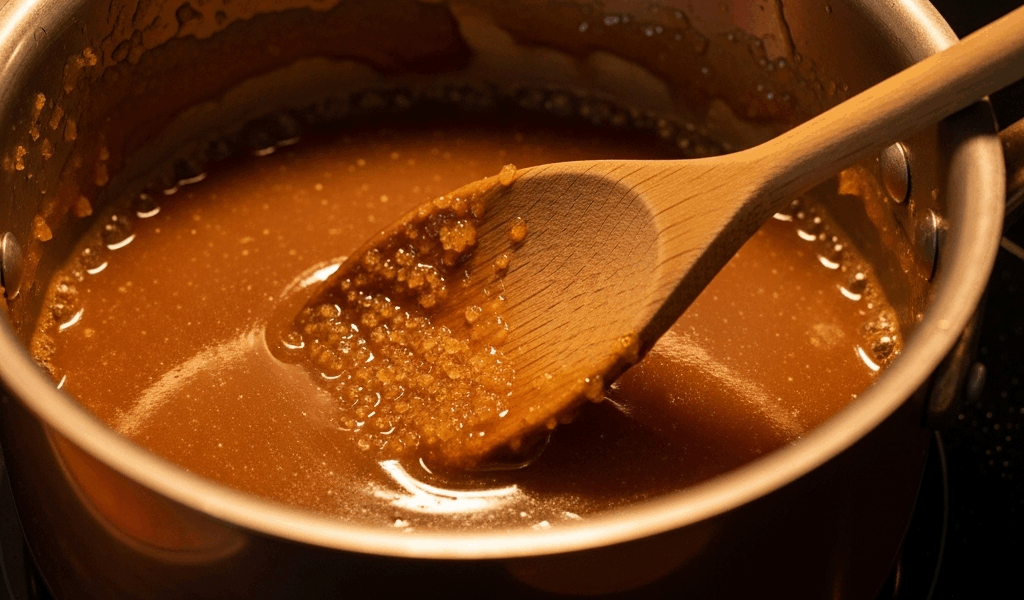
But what is crystallization, really? In essence, it’s a chain reaction triggered by a single rogue sugar crystal. But it’s much more than that. That one crystal acts like a magnet. Other sugar molecules latch onto it, stack on top of it, and within seconds your glossy amber sauce turns into a grainy, clumped-up mess that looks like wet sand.
Here’s what’s happening in plain terms: sugar dissolves into liquid when heated. But if one stray crystal finds its way into the mix— or if conditions shift suddenly— it gives every other molecule a landing pad. They pile on. You end up with crystalline structure instead of syrup. It’s not a sign you’re failing. It’s a sign the conditions were perfect for crystallization to happen. Understand those conditions, and you can stop it every time.
The Most Common Reasons It Happens
You stirred while the sugar was melting
Stirring introduces friction. Friction encourages crystal formation. When you move a spoon through partially dissolved sugar, you’re scraping crystal-forming surfaces against each other— basically inviting trouble. The dry method is especially vulnerable here because undissolved granules are just sitting there in the pan, waiting to cause problems.
Sugar crystals clung to the pan walls
As caramel heats up, sugar that splashes onto the sides of the pan dries out and crystallizes. When those hardened bits fall back into your liquid caramel— and they will— they seed the entire batch. That’s what was happening the first dozen times I made caramel and couldn’t figure out why it kept seizing. Took me embarrassingly long to notice the culprit clinging to the sides of my pan the whole time.
Your equipment wasn’t actually clean
A wooden spoon with invisible residue from last Tuesday’s project. A pan with a microscopic film left from a quick rinse. Butter smeared on the inside wall. Any of these introduce foreign particles that nucleate— that’s the fancy word for kickstarting— crystallization. You need genuinely clean equipment here. Not just dish-soap-and-a-quick-rinse clean. Actually clean. Don’t make my mistake.
You used the wrong type of sugar
Brown sugar, muscovado, turbinado— all of these crystallize faster than plain white granulated sugar because of the molasses content, which messes with how crystals form. I learned this the hard way when I grabbed organic cane sugar thinking it would be “better” for a batch. It seized almost immediately. If a recipe doesn’t specify the sugar type, assume it means standard white granulated. That’s probably the safest default.
How to Stop Crystallization Before It Starts
Before you turn on the heat— the wet method setup
I recommend the wet method for home cooks— at least if you want something more forgiving than the alternative. Combine equal parts white sugar and water in your pan. A 50/50 ratio. Making a cup of caramel? Use half a cup of sugar, half a cup of water. Stir over low heat until the sugar fully dissolves and the mixture goes completely clear. Usually takes about 2 to 3 minutes. That’s the only time you touch it with a spoon.
The water keeps everything in suspension. Crystals can’t form easily in a dilute solution— that’s the whole point. You’re getting the sugar into liquid form before the heat climbs high enough to cause problems.
If you go with the dry method instead— sugar straight into a hot pan, no water— you need absolute discipline. Do not stir. Ever. I mean it. Let gravity and residual heat distribute the sugar on their own. It feels completely unnatural to just stand there watching. But it works. Dry method is faster, honestly, but it demands near perfection.
Once the sugar dissolves— stop touching it
This is the hardest part. Every instinct you have will tell you to stir, swirl, move the pan. Resist all of it. Once that solution is clear, your job is done. Bump the heat to medium or medium-high and let convection do the work. The liquid will bubble gently and eventually turn golden, then amber.
One exception: if you spot crystals forming on the upper walls of the pan, use a wet pastry brush to push them back down into the liquid. One swipe. Gentle. Then leave it alone again.
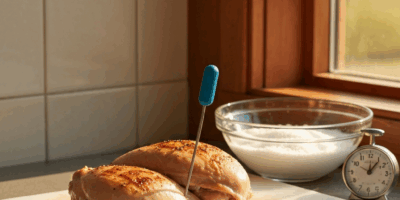
While it browns— watch the color, not the thermometer
Light amber runs around 320°F— that’s roughly 160°C. Medium amber sits at about 340°F. Dark amber hits 350 to 360°F. A thermometer is useful, but color is the real guide here because it maps directly to flavor in a way temperature readings just don’t capture. Once you see the shade you’re after, pull it off the heat immediately.
That’s also the moment you add cream, butter, or anything else. Do it off the heat. The caramel will bubble furiously— that’s normal. It’s reacting to the temperature difference, not crystallizing. Let it do its thing.
How to Save Caramel That Has Already Seized
Probably should have opened with this section, honestly, because it’s what most people actually need to know. Seized caramel looks grainy, feels gritty, and seems like a total disaster. It’s not always beyond saving.
Pull the pan off the heat first. Let it sit for about 30 seconds. Then add warm water— not cold, not boiling, just warm from the tap— one tablespoon at a time. Start with one tablespoon for every cup of caramel in the pan.
Stir gently, then return the pan to low heat. Don’t expect anything dramatic right away. The crystals will slowly dissolve back into solution as the water rehydrates them and the gentle heat encourages them to let go. Usually takes 3 to 5 minutes. Stir occasionally and slowly. The graininess should fade.
Once it looks smooth again, take it off the heat and let it cool slightly before using. The texture might be a little thinner than before— that’s the added water— but the flavor should be intact.
When is it too far gone? If the caramel has gone completely opaque and grainy all the way through, or if it smells burnt rather than rich and deep, warm water isn’t going to fix it. That’s a restart situation.
Quick Reference— What Went Wrong and the Fix
- Stirred while sugar was melting: Next time, stir only until dissolved, then hands off completely.
- Crystals on the pan walls fell in: Use a wet pastry brush to sweep them back down during cooking.
- Equipment had residue: Wash and rinse thoroughly— consider keeping a dedicated caramel pan.
- Used brown or specialty sugar: Switch to plain white granulated sugar for reliability.
- Caramel already seized: Add warm water one tablespoon at a time and reheat gently over low heat.
- Unsure about wet vs. dry method: Wet method— sugar plus water— is the more forgiving starting point for beginners.


Stay in the loop
Get the latest home cuisine delights updates delivered to your inbox.